Alright, let’s cut to the chase—if you’ve ever messed around with a coil tattoo machine, you know the springs make or break how it runs. Too stiff, and it yanks the ink way too hard; too loose, and it skips like a bad record. As someone who’s been supplying tattoo machines for over a decade (yeah, I’ve seen every beginner mistake under the sun), I’m gonna walk you through replacing those springs step-by-step, no fancy jargon, no overcomplicating things. Let’s get to it. Tattoo Machine
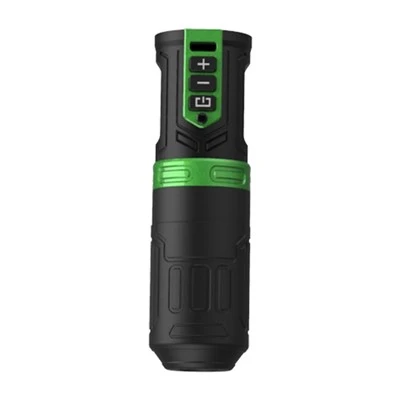
First off, why even swap springs? I’ve had regulars come back saying their machine used to jump like a spooked cat mid-line—turns out their front spring was stretched out from years of hard hits, or the back one was too loose so it wasn’t snapping right. Sometimes it’s just a bad batch of springs (yep, it happens, even with quality parts) that came with a new machine kit. Whatever the reason, this fix is straightforward if you take your time. Pro tip: I always tell new artists to keep a small stock of spare springs in their kit—like, two front, two back, different tensions. You’ll thank me later when you don’t panic mid-session.
Let’s start with the stuff you’ll need. Don’t go grabbing random tools from your junk drawer. You’ll need: a pair of precision needle-nose pliers (not the big ones for breaking nails—tiny ones, like the ones for jewelry), a small flathead screwdriver (thin, not the one you use to open paint cans), a set of coil springs (front and back, matching the gauge your machine uses—wait, most standard coils are 18 or 20 gauge, right? If you’re not sure, check the old ones), a soft cloth to lay your parts on (no scratching those frame parts!), and maybe a spare rubber band to hold tiny screws when you take them out—they love to roll under the table, trust me. Oh, and turn your machine OFF, obviously—don’t be the guy who burns his fingers.
Step 1: Disassemble the basics. Grab that soft cloth and set your machine on it so you don’t scratch the finish. First, unscrew the contact screw (that’s the little one at the back, near the coil) and the adjusting screw (the one up front that sets the gap between the front spring and the armature bar). Loosen them just enough that you can pull the armature bar out—don’t yank it, it’s connected to the back spring. Once the armature bar is out, you’ll see the two springs: the front spring is the shorter one, attached to the front of the frame, and the back spring is the longer one, connected to the contact screw. If you’re only swapping one, do the one that’s stretched or bent—no need to mess with both unless they’re both garbage.
Step 2: Remove the old spring. Let’s do the back one first, since that’s the trickier part. The back spring is usually held in by a tiny set screw on the side of the frame, right? Use your precision pliers or screwdriver to loosen that set screw—don’t unscrew it all the way, you’ll lose it. Once it’s loose, you can pull the old back spring out gently. Now the front one: it’s held in the same way, sometimes a set screw on the front of the frame. Loosen that, and the front spring slides right off the armature bar post. Easy peasy, right? Wait, hold on—make sure you note how the old spring was oriented. Some springs have a little bend or a tab that lines up with the frame, so if you just yank it out and put the new one in backwards, it’ll never align right. I learned that the hard way with a custom machine once—had to take it apart three times because I flipped the back spring.
Step 3: Install the new spring. Alright, new spring time. Let’s start with the front one first because it’s simpler. Take your new front spring, slide it onto the post on the front of the frame, then line the other end up with the hole in the armature bar. Tighten that set screw just enough so it doesn’t wiggle—don’t crank it, you’ll strip the screw. Now the back spring: this is where people mess up. Take the new back spring, make sure the tab or bend is facing the right direction (match the old one’s angle), slide it onto the set screw on the frame, then thread the armature bar’s back end into the loop of the back spring. Tighten the set screw here too—snug, not crazy tight.
Step 4: Adjust the gap. This is the make-or-break part. The gap is the space between the top of the front spring (or the armature bar’s top) and the contact screw. You want it to be around 1/32 of an inch—like a piece of printer paper thickness. Why? If it’s too big, the machine will hit too hard and jump; too small, it won’t snap enough and will skip lines. Grab your adjusting screw (the front one) and turn it in or out until that gap is right. Now, test it—gently push the armature bar down until the front spring touches the contact screw. If it springs back evenly, you’re good. If it sticks, the gap is too small; if it doesn’t reach, it’s too big.
Step 5: Test it out. Put the machine back together, plug it into a power supply (low voltage first—like 6-7 volts, not full blast), and run a quick test on a piece of practice skin or even a rubber eraser. Listen to the sound—if it’s a steady hum, like a bee, that’s good. If it’s rattling or skipping, you need to tweak the gap or maybe check if the spring is aligned right. Don’t crank the voltage up high right away—you’ll burn out a new spring in 5 minutes if it’s not adjusted right.
Wait, let’s talk about common mistakes I see. First, using the wrong gauge spring. If your old spring is 18 gauge, don’t put 20 gauge in—20 is stiffer, and it won’t match your machine’s needs. Most coil machines are grouped by shader or liner too—liners usually use stiffer springs, shaders a bit looser. But honestly, a lot of it is personal preference, so once you get the hang of it, you can mix and match for your style. Another mistake: over-tightening the set screws. Those tiny screws are super easy to strip, and once you strip them, you gotta order new parts, which is a pain. I keep a little container of spare set screws in my supply room—worth every penny. And lastly, not cleaning the frame while you’re at it. When you take the machine apart, wipe down the frame with a little isopropyl alcohol—all that ink and gunk builds up, and it can mess with how the springs move. You’re already taking it apart, might as well do a quick clean, right?
Speaking of supplies—if you’re tired of ordering junk springs that stretch after a month, hit us up. We supply precision coil springs in all standard gauges, pre-tensioned so you don’t have to guess if they’ll work with your machine. We’ve got both front and back springs, sold individually or in packs, and we make sure each one is tested before it leaves our warehouse. No more dealing with springs that are bent out of the box, no more wrong gauges, just consistent parts that’ll make your machine run like a dream.
Wait, let’s make this real—last month, I had a artist from Brooklyn email me saying he swapped his springs with a cheap set from another supplier, and his liner was skipping so bad he had to redo three lines on a client. Switched to our springs, adjusted the gap, and he told me it was the smoothest line he’d pulled all year. That’s the stuff we care about—getting artists back to tattooing, not messing with their machines.
Another tip: if you’re a beginner, practice on an old machine first before messing with your daily driver. I see too many new artists grab their favorite machine, yank out the springs, and mess up the alignment so bad they have to send it to a tech to fix. Take a beat, grab a beat-up machine you don’t use often, practice swapping springs and adjusting the gap. Once you get the hang of it, you can do it in 10 minutes on your good machine mid-session if you need to.
Oh, and one more thing—don’t ignore bent springs. If your old spring has a little kink in it, even if it still stretches, that’s gonna mess with the balance. The armature bar needs to move straight up and down, no side to side. A bent spring will cause side movement, which leads to uneven lines, and it can even wear out your contact screws faster. So if you see a kink, just swap it. It’s not worth the hassle of fixing line work because you tried to save a $2 spring.
Alright, wrap-up time. Replacing coil machine springs isn’t rocket science—you just gotta take your time, pay attention to how parts go together, and not skip the gap adjustment. And if you’re tired of fighting cheap parts, we’ve got you covered. Whether you need a single set of springs or bulk supplies for your shop, reach out to us for a chat about what works best for your machines. We don’t do pushy sales, we do real advice because we’re tattoo people too—we know how important a reliable machine is to your art.

So that’s it. Step by step, no nonsense, no fancy tools, no AI-made jargon. Next time your machine is skipping or jumping, grab your pliers, a new spring from a trusted supplier, and give this a go. You’ll be back to tattooing smooth lines in no time.
Wireless Tattoo Machine References:
- Professional Tattoo Machine Repair Guide, Tattoo Artists Association International, 2022
- Coil Spring Tension and Function in Rotary/Coil Tattoo Machines, Journal of Tattoo Equipment Technology, 2021
- Practical Maintenance for Coil Tattoo Machines, Independent Tattoo Supply Review, 2023
Zhuji Taituo Machinery Technology Co., Ltd.
Zhuji Taituo Machinery Technology Co., Ltd. is one of the best tattoo machine manufacturers and suppliers in China for over 20 years, also supports customized service. Welcome to buy advanced tattoo machine made in China here and get quotation from our factory. For price consultation, contact us.
Address: 101, Building 12, Youdi, No. 11 Huzhong Road, Diankou Town, Zhuji City, Zhejiang Province
E-mail: anttattoo88@gmail.com
WebSite: https://www.antinktattoo.com/
